
![]()
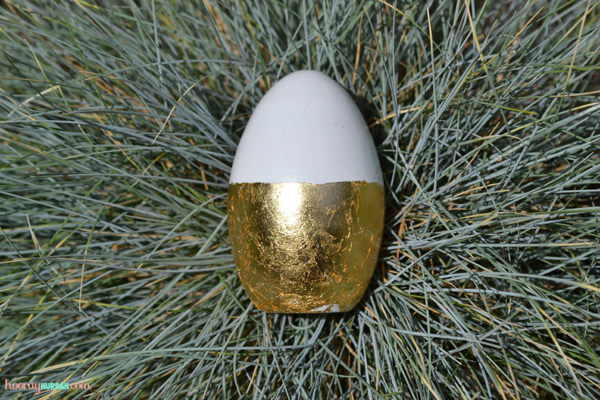
I’d been itching to experiment with gold leaf for a while now. It was actually much easier than I had anticipated! I started with a few eggs, but now that I’ve got the knowhow to do it, someone’s probably going to have to stop me from covering everything I own in gold leaf…
![]()
![]()
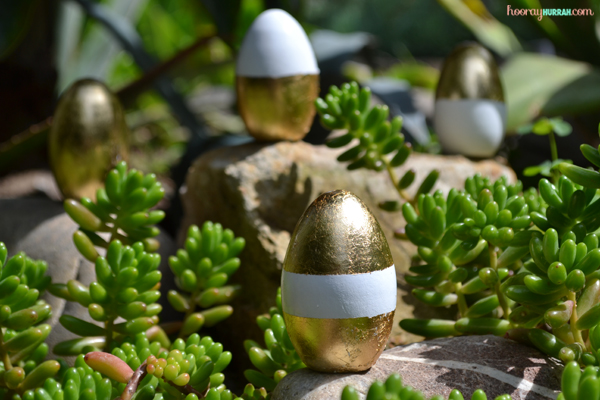
These gilded eggs really make me want to stomp my foot and, in my very best Veruca Salt voice, proclaim:
Gooses! Geeses! I want my geese to lay gold eggs for Easter!

![]()
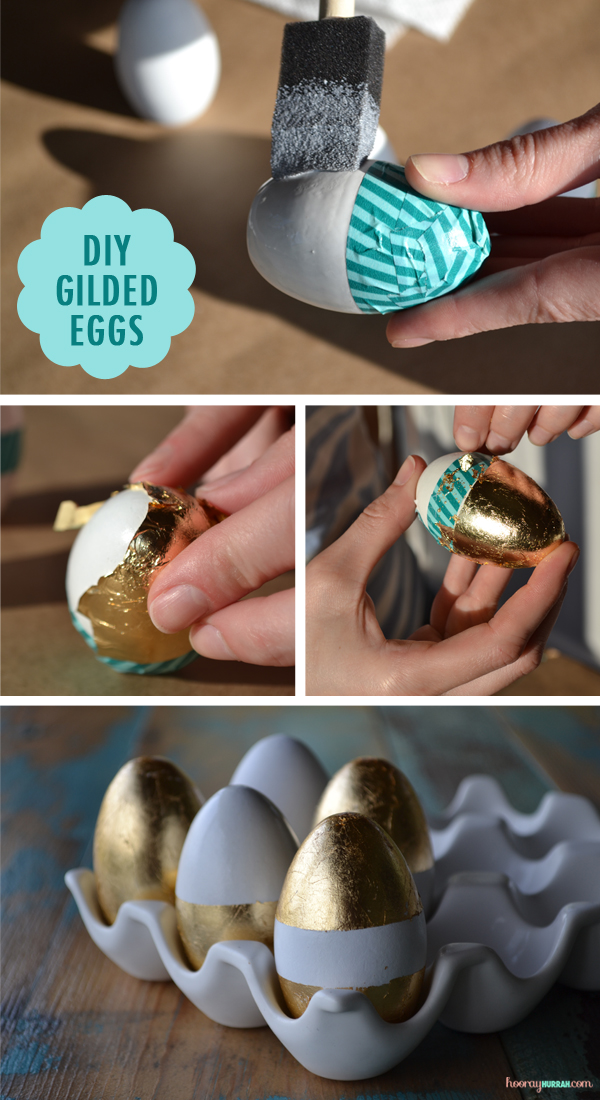
Here’s how I made them…
I USED:
- White Wooden Eggs (real eggs should work just as well, but I just wanted these to last a little longer)
- Gold Leaf
- Metal Leaf Adhesive aka ‘Adhesive Size’
- Sponge brush
- Washi or Painter’s Tape
- Metal Leaf Spray Sealer
![]()
INSTRUCTIONS:
- Cover the area that you want to remain white with washi tape.
- Use your brush to apply a thin layer of metal leaf adhesive onto the surface of the egg. Wait 30 to 45 minutes for the adhesive to dry and become tacky.
- Gently pick up a sheet (or part of a sheet) of gold leaf and apply to the tacky surface, firmly pressing into place and smoothing it out as you go. Use your brush to remove any excess gold leaf.
- Very gently, peel the washi tape off of the eggs.
- Spray your eggs with two coats of metal leaf spray sealer, waiting 15 minutes in between coats. (This stuff is a little potent, so I recommend doing this last step outside.)
